
Hi my dear readers, during this days I have been working on my new craft room… like all the crafter’s we want a beautiful craft room, so I decided to convert some shoe boxes into a storage boxes that looks beautiful in my new craft room. And in an inspirational moment I finished with this two beautiful boxes and here I leave you a tutorial to make it… 😉
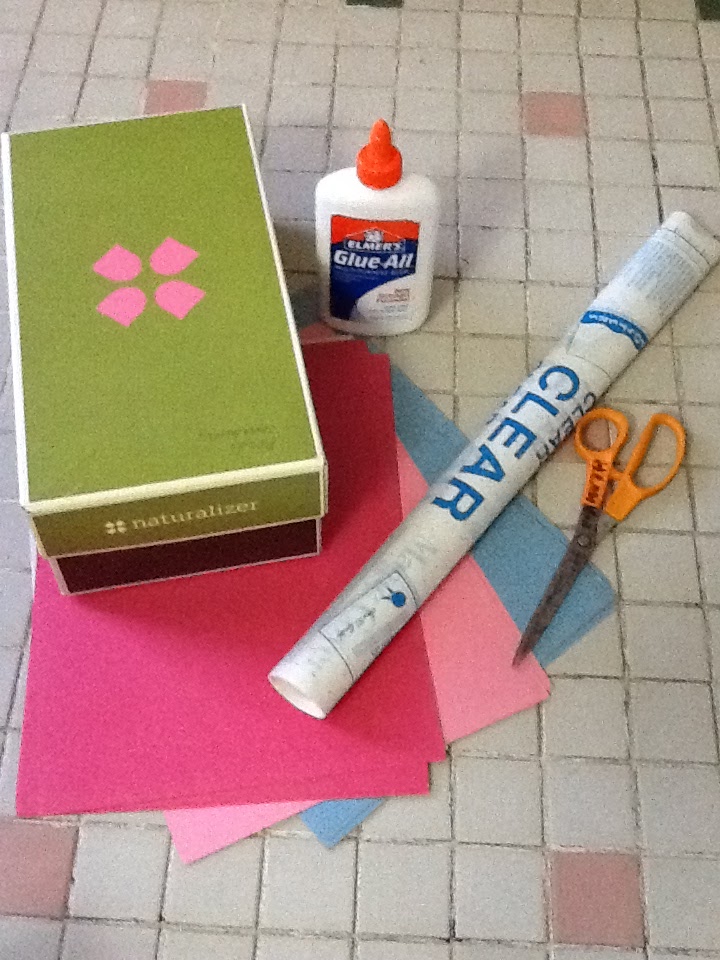
To make this beautiful boxes we need: a shoe box, multi-purpose glue, scissors, clear contact paper, some colors of construction paper, pencil, and something round. This tutorial is to make the doted blue box, if you want to make another design feel free to do it, that is the real meaning of creativity never doing the same.
First we need to put the base color, for this size of box I used 6 papers (2 for the lid, and 4 for the bottom part), let’s going to do the lid first… so let’s get started 😀

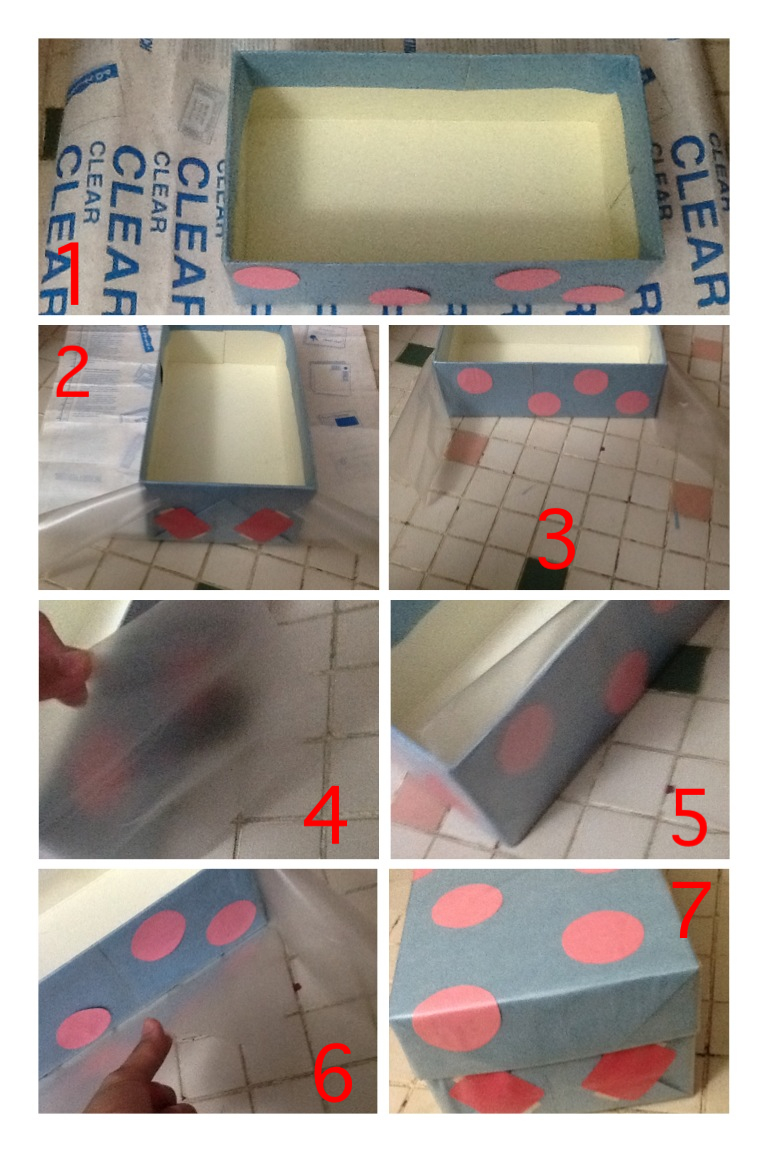
- step 1: paste the paper to the top part of the lid, like image 1.
- step 2: paste the long sides, like image 2.
- step 3: paste the protruding part of the inside of the lid, like image 3.
- step 4: to do the short sides, fold and paste like you’re wrapping a gift. Like image 4, 5 and 6.
- step 5: if you have the remaining show in image 7, paste it like the image 8.
- step 6: repeat steps 4 and 5 in the other side, like image 9.
- step 7: repeat all the steps in the bottom part of the box, like image 10.
After this come the best part… decorate the box \O/
If you want to the same design that I do, you need to cut 21 circles and paste it around the box. Then I made four images of sewing threads because that box is specifically to storing threads, but you can make an images that identify what you’re going to put in. Now we are in the final part, is time to place the contact paper to protect our box.
Placing the contact paper is basically the same steps that we do with the base color, so let’s get started with the contact paper…
- step 1: cut a piece of contact paper bigger than the box, that when you fold all the sides you have an extra to fold inside the box.
- step 2: place the short side first, like image 2.
- step 3: place the long sides like image 3 and 6.
- step 4: place the excess of the shorter sides, like image 4 and 5.
- step 5: repeat al the steps with the lid, then you have your box ready to use \O/
I hope that you enjoy this tutorial!!! Wait for the next project and let your creativity fly… 😉

